Please scroll down to skip the preface and see the results.
Choosing which light to use for a specific setup can be as hard as coming up with the light setup itself. The variables such as power draw, cost of rent, shoot location, and of course, the light quality and output play a big part in the decision-making process. However, our presuppositions about lighting and imaging technologies are mostly derived from either the anecdotal knowledge of industry professionals or the marketing pamphlets of the manufacturers. Both sources might very well be correct, yet still do not offer a comparative approach. To test this a priori knowledge of particular types of lighting technologies and fixtures, my colleague Sal Ardongde and I, conducted a light test comparing various units available at Loyola Marymount University School of Film and TV. We hope to offer an accurate and clear representation of the options available to us and our colleagues.
Many thanks to our supervisor and cinematography professor Peter Soto, his teaching assistant Katie Hopkins, LMU Lighting and Grip technical coordinator Elise Dean, our talented and patient model Victoria Germano, and our classmates Ben Wang, Brendan Friesen, Jiyeon Kim, and Mari Kure who made this light test possible.
METHOD
Focusing on the intensity, quality, and color rendition of the light fixtures, we came up with the following method of study:
The model is seated before a solid backdrop.
A color chart and a gray card are placed on each side of the model.
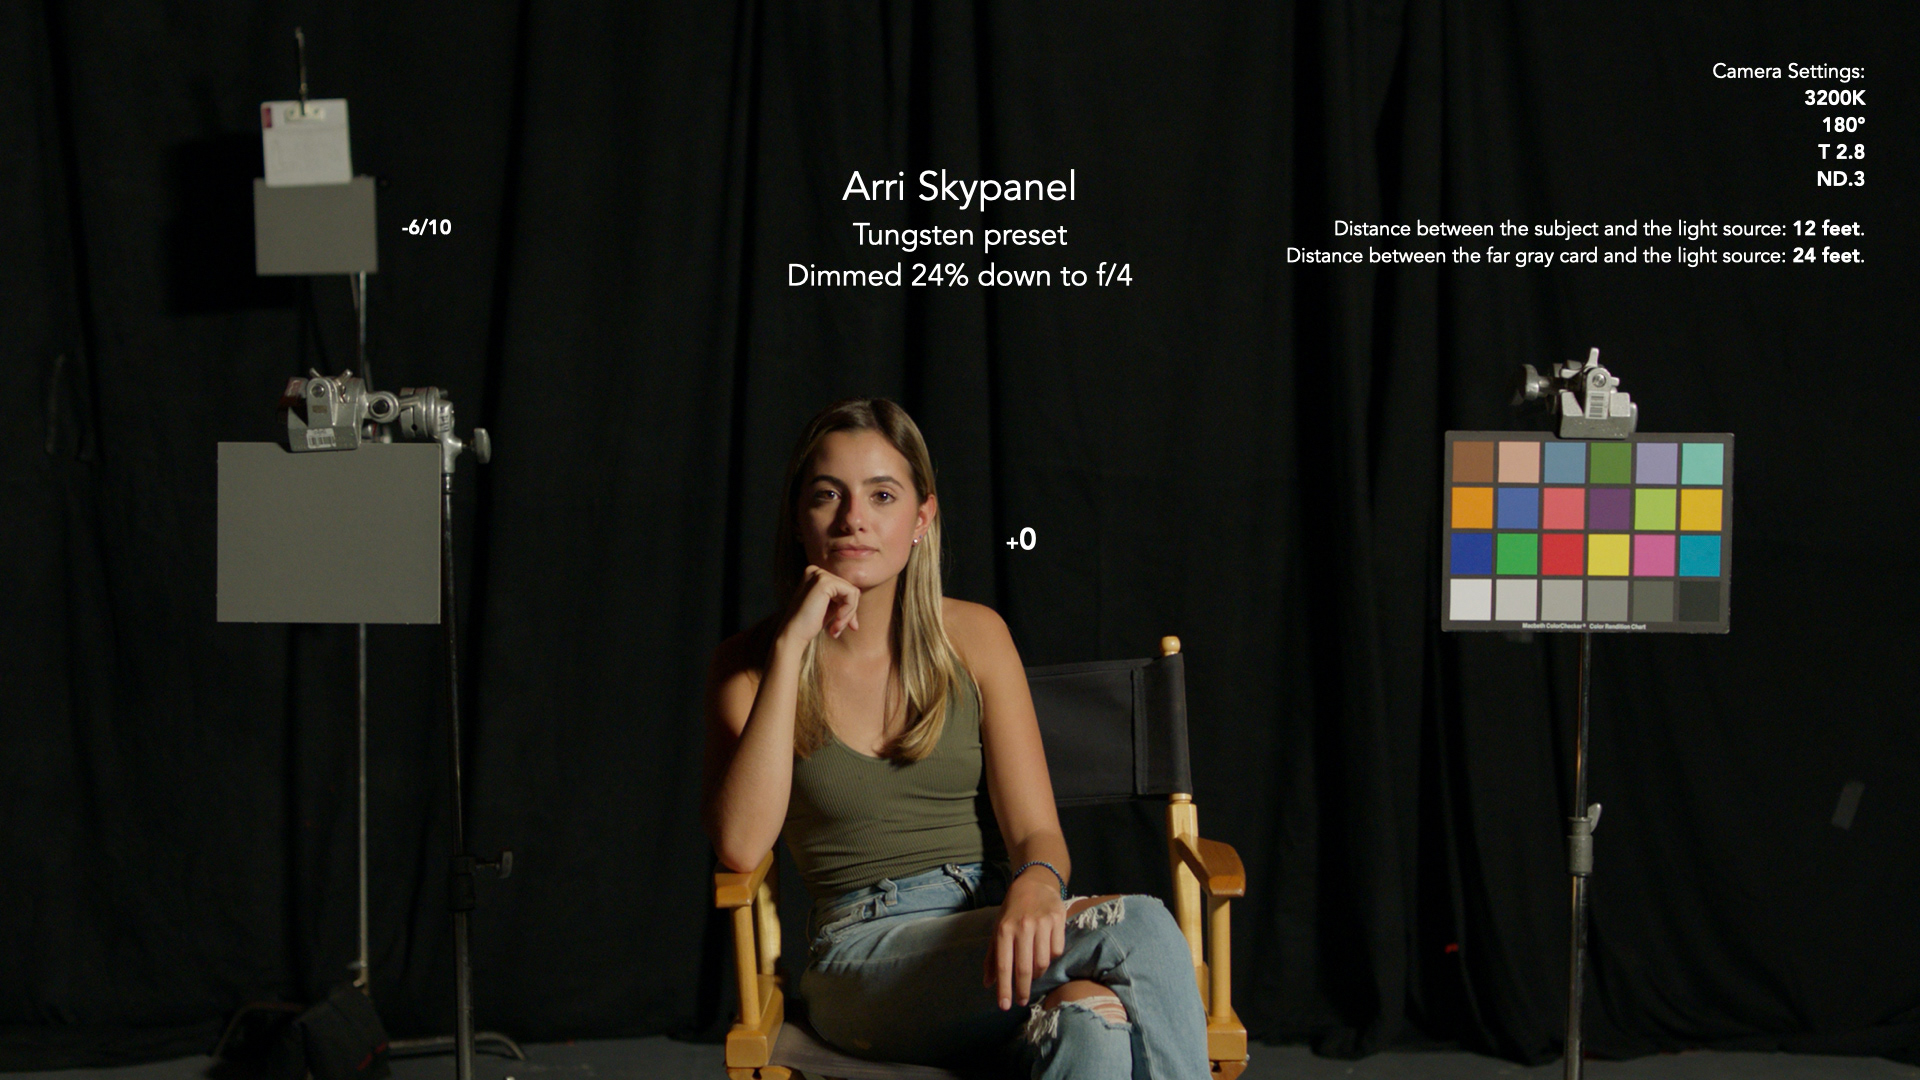
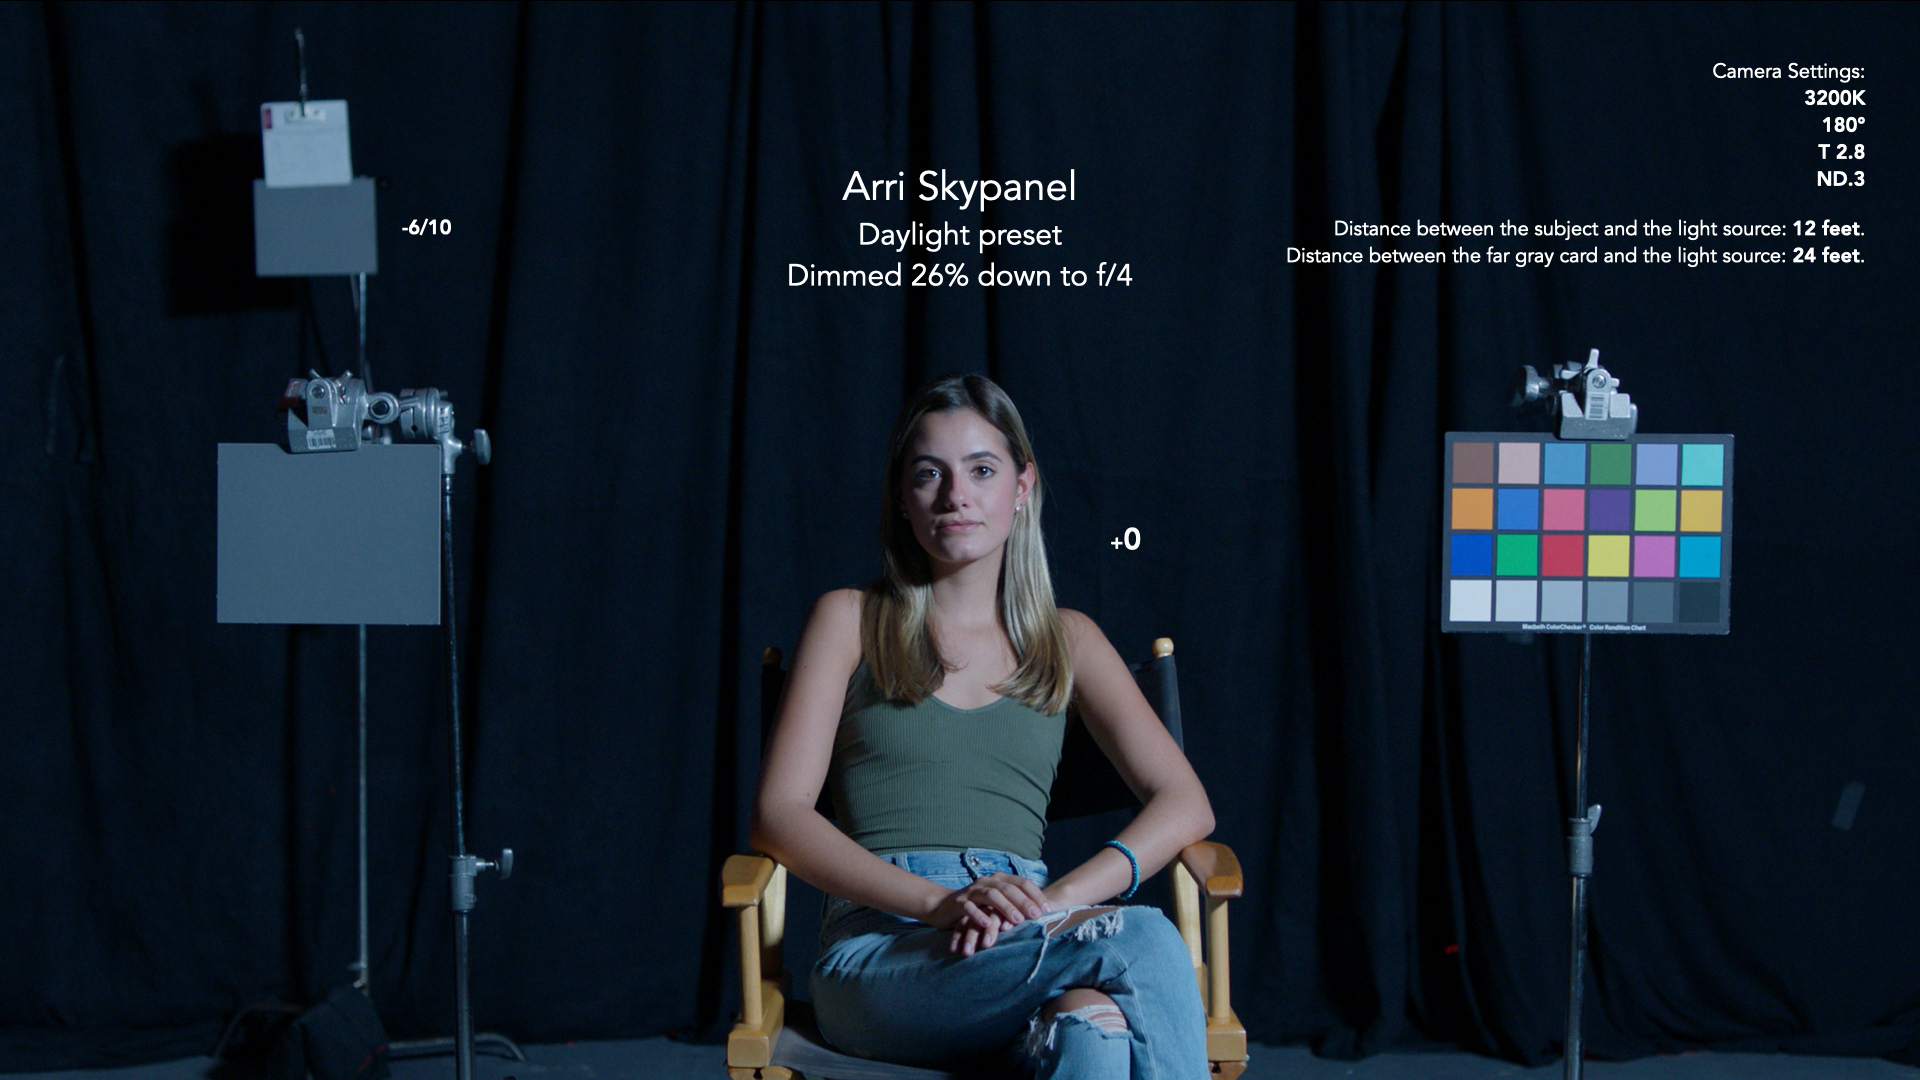
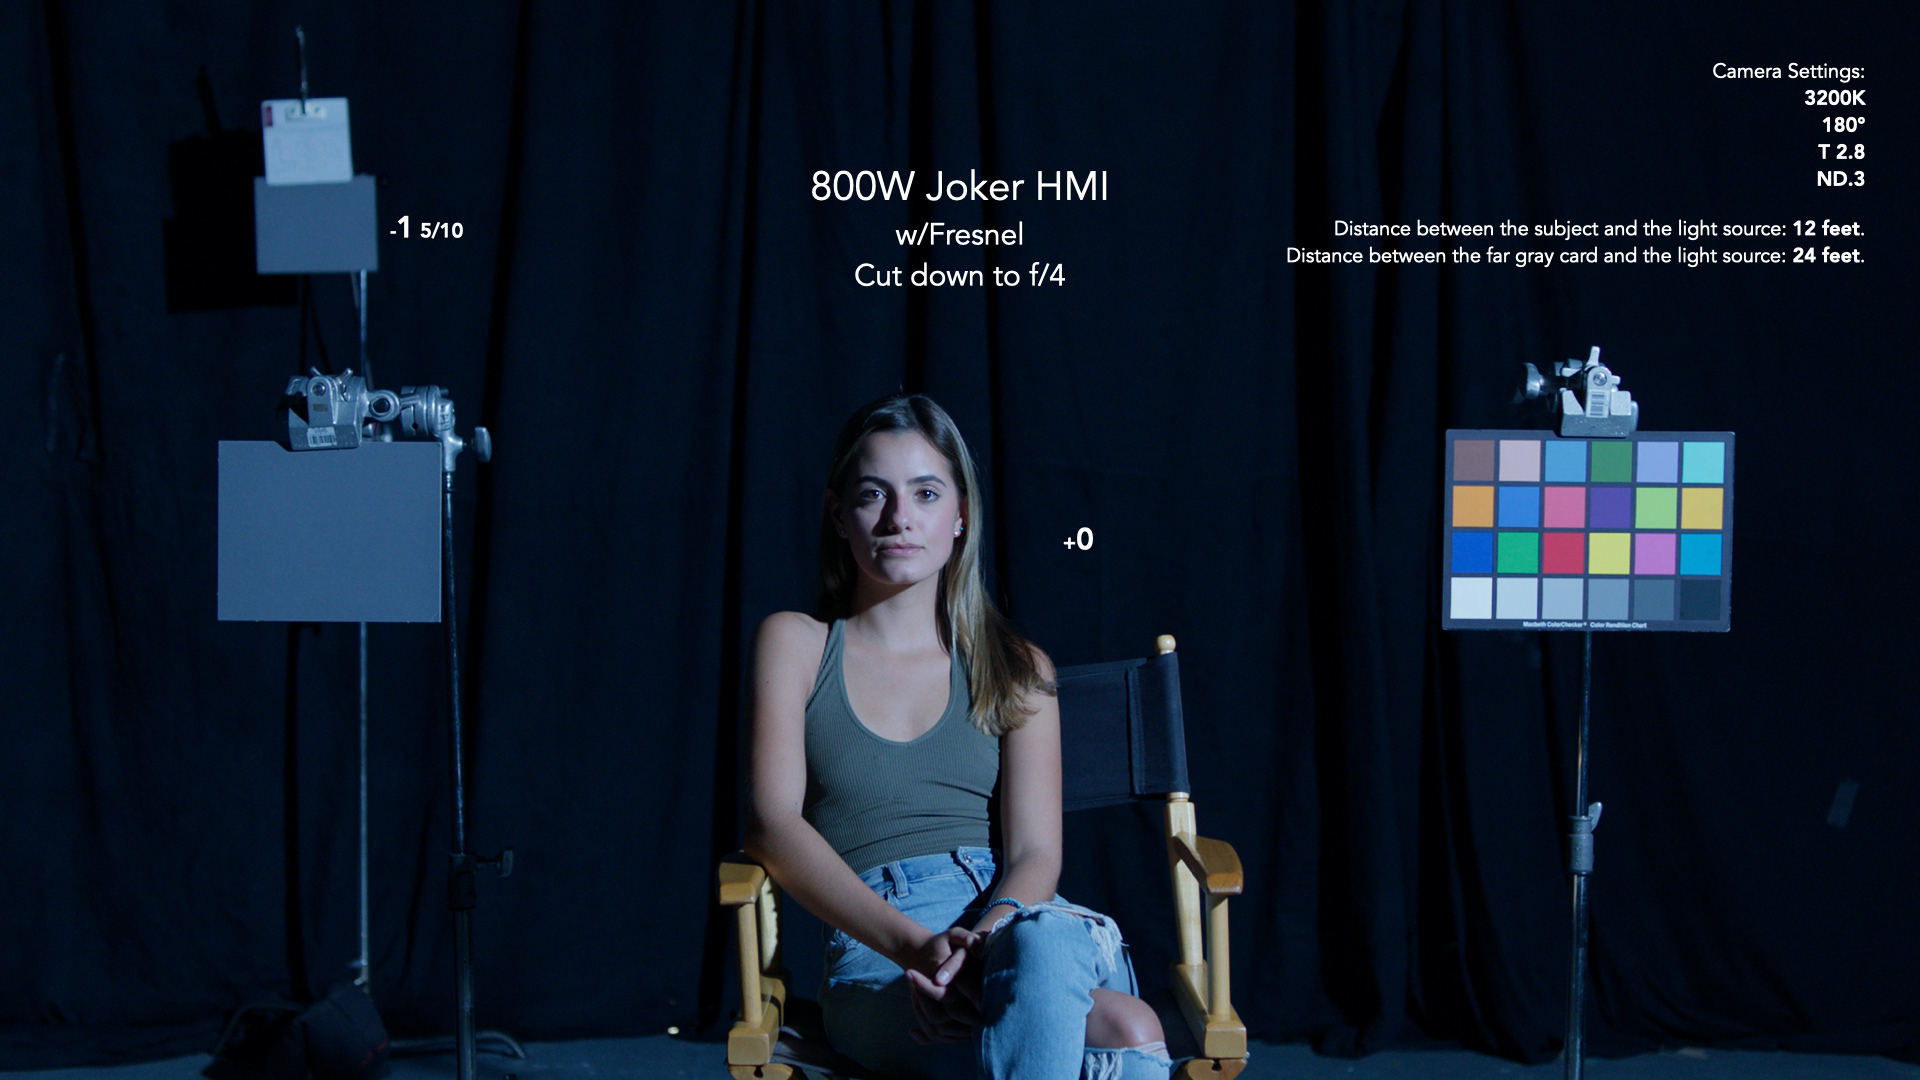
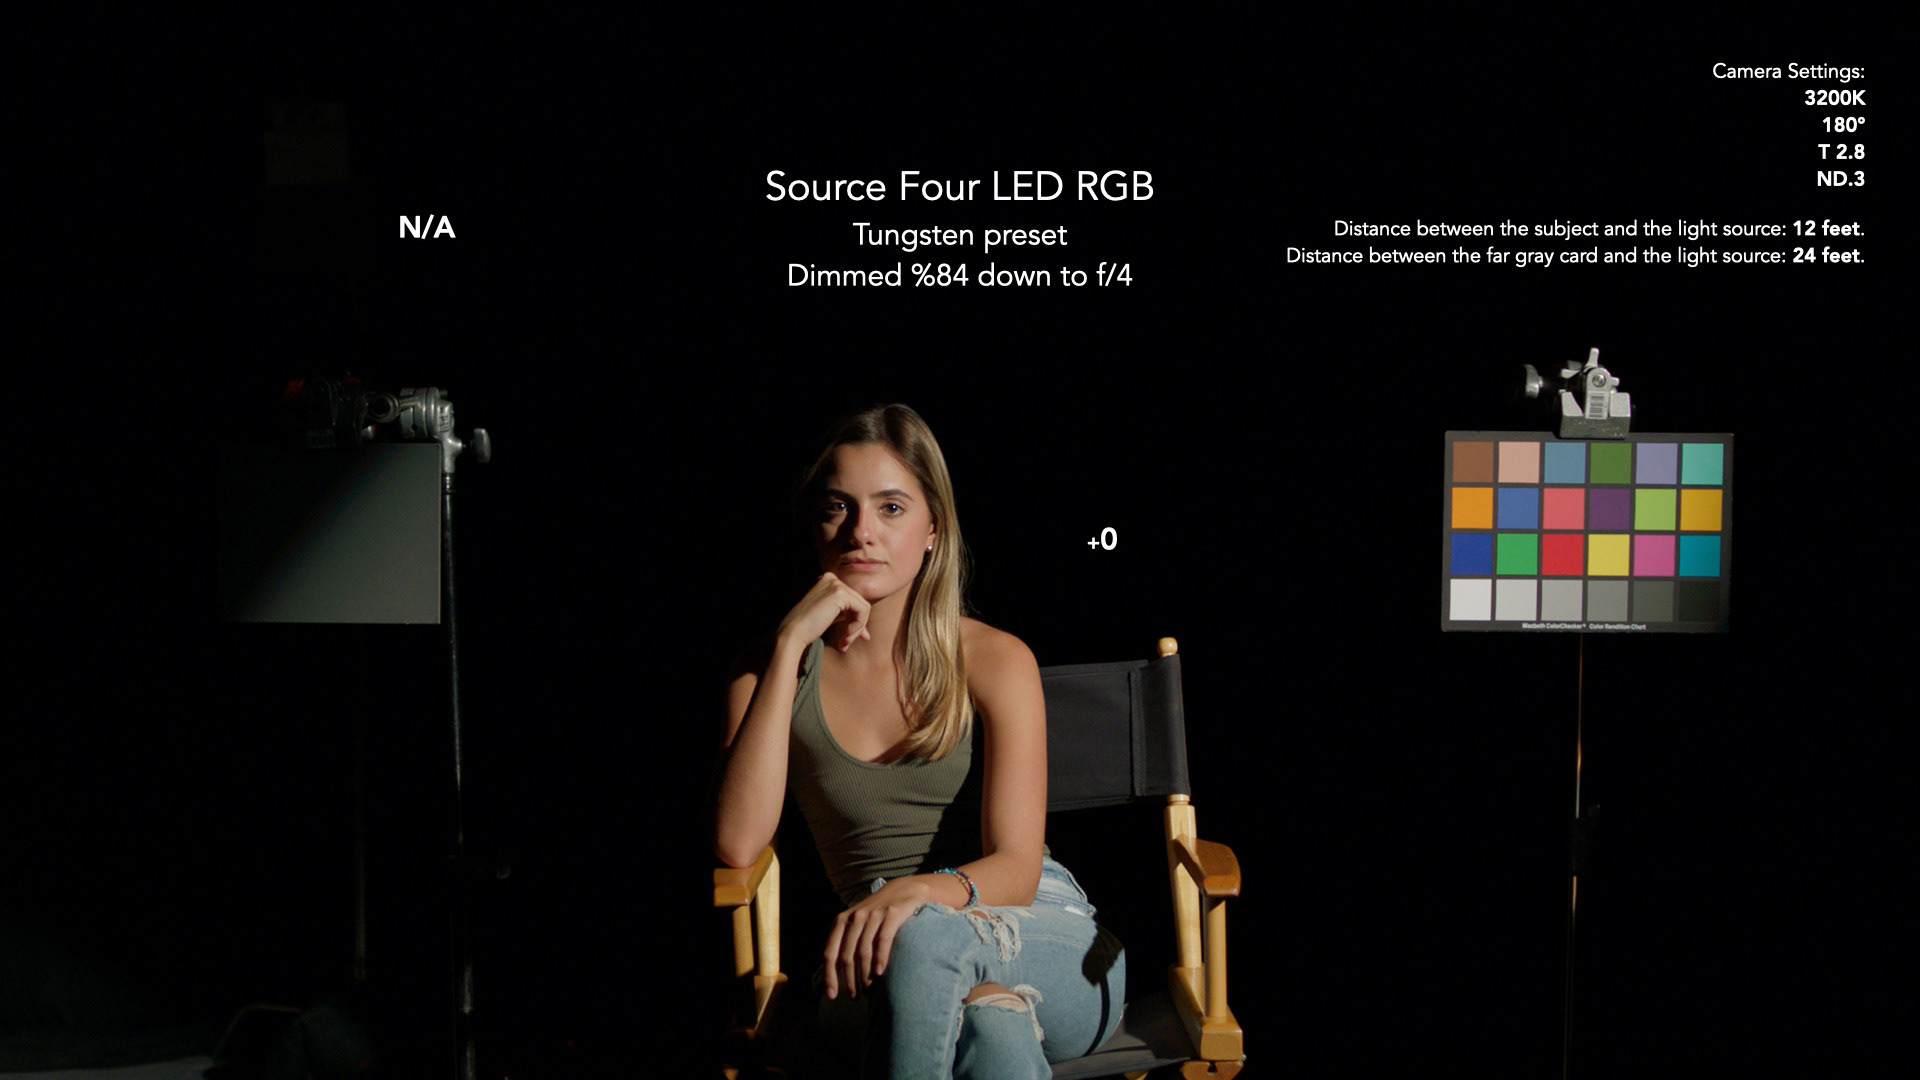
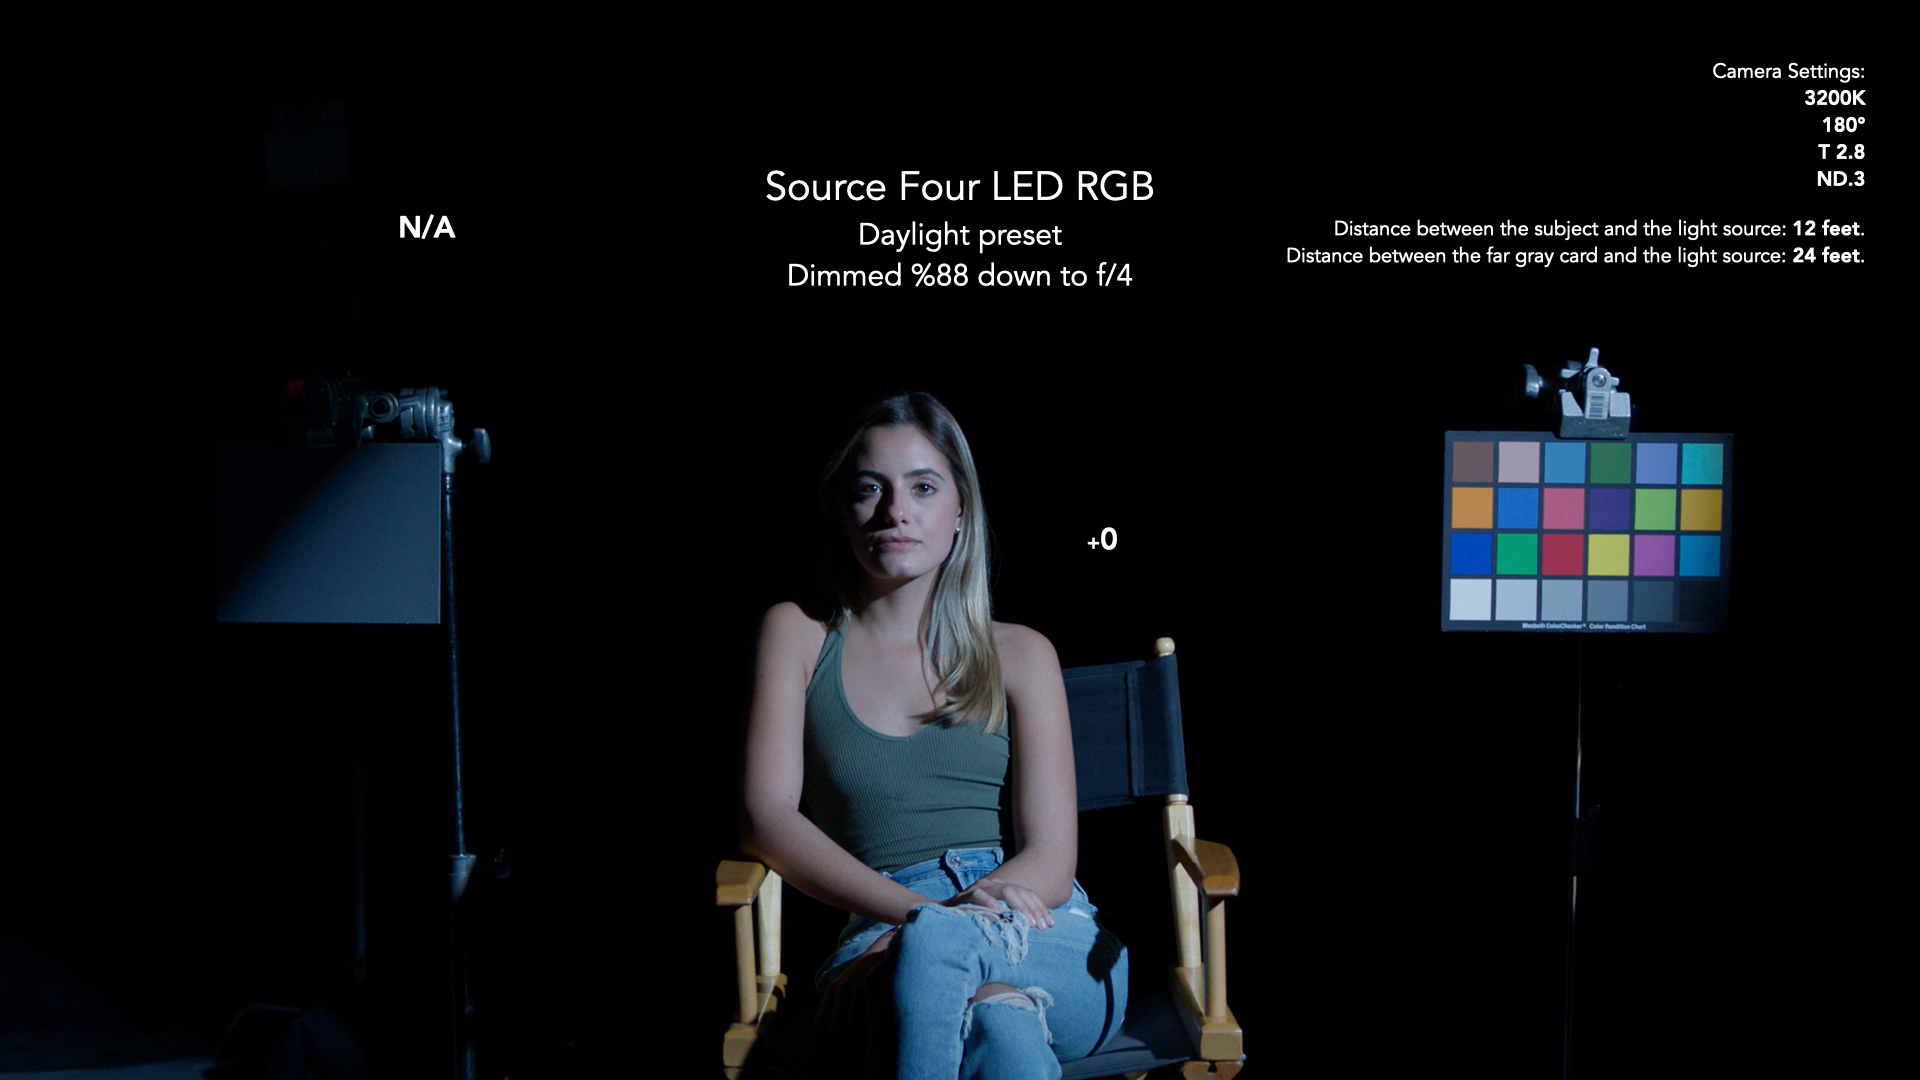
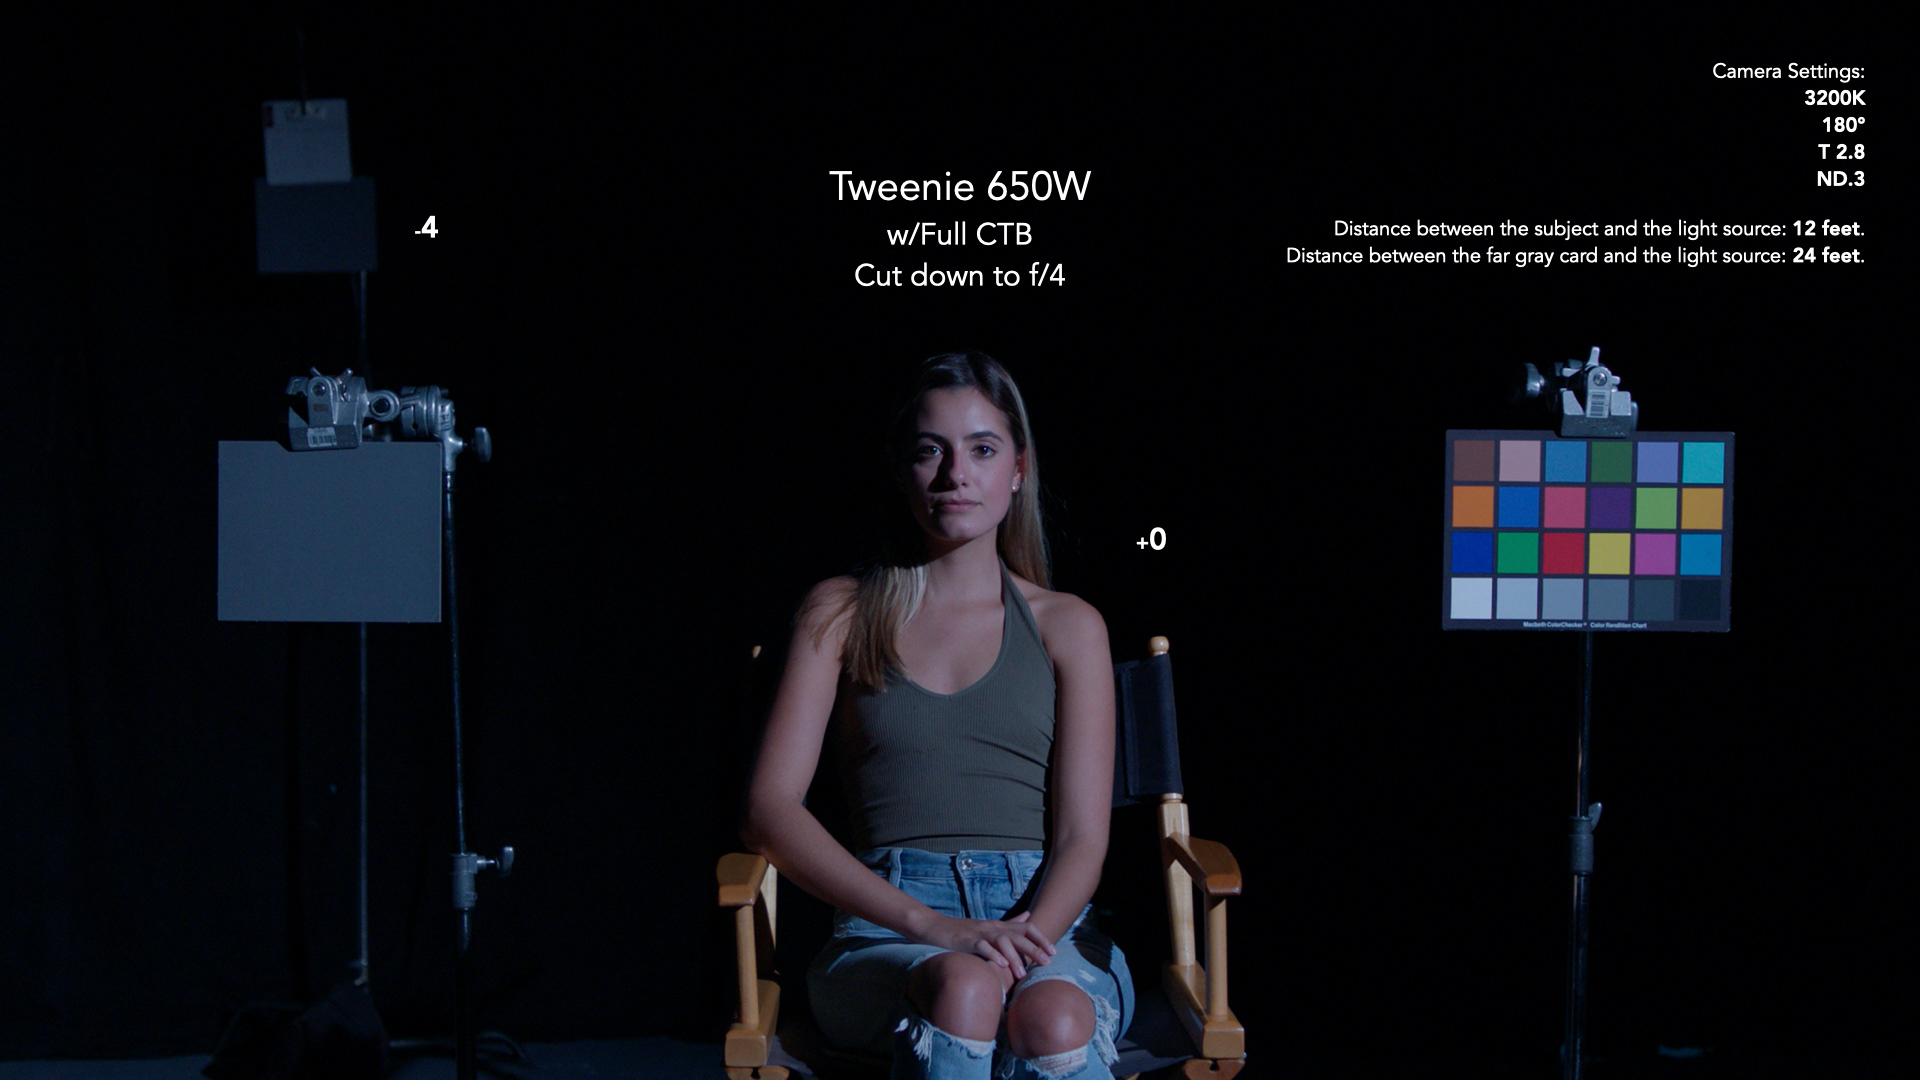
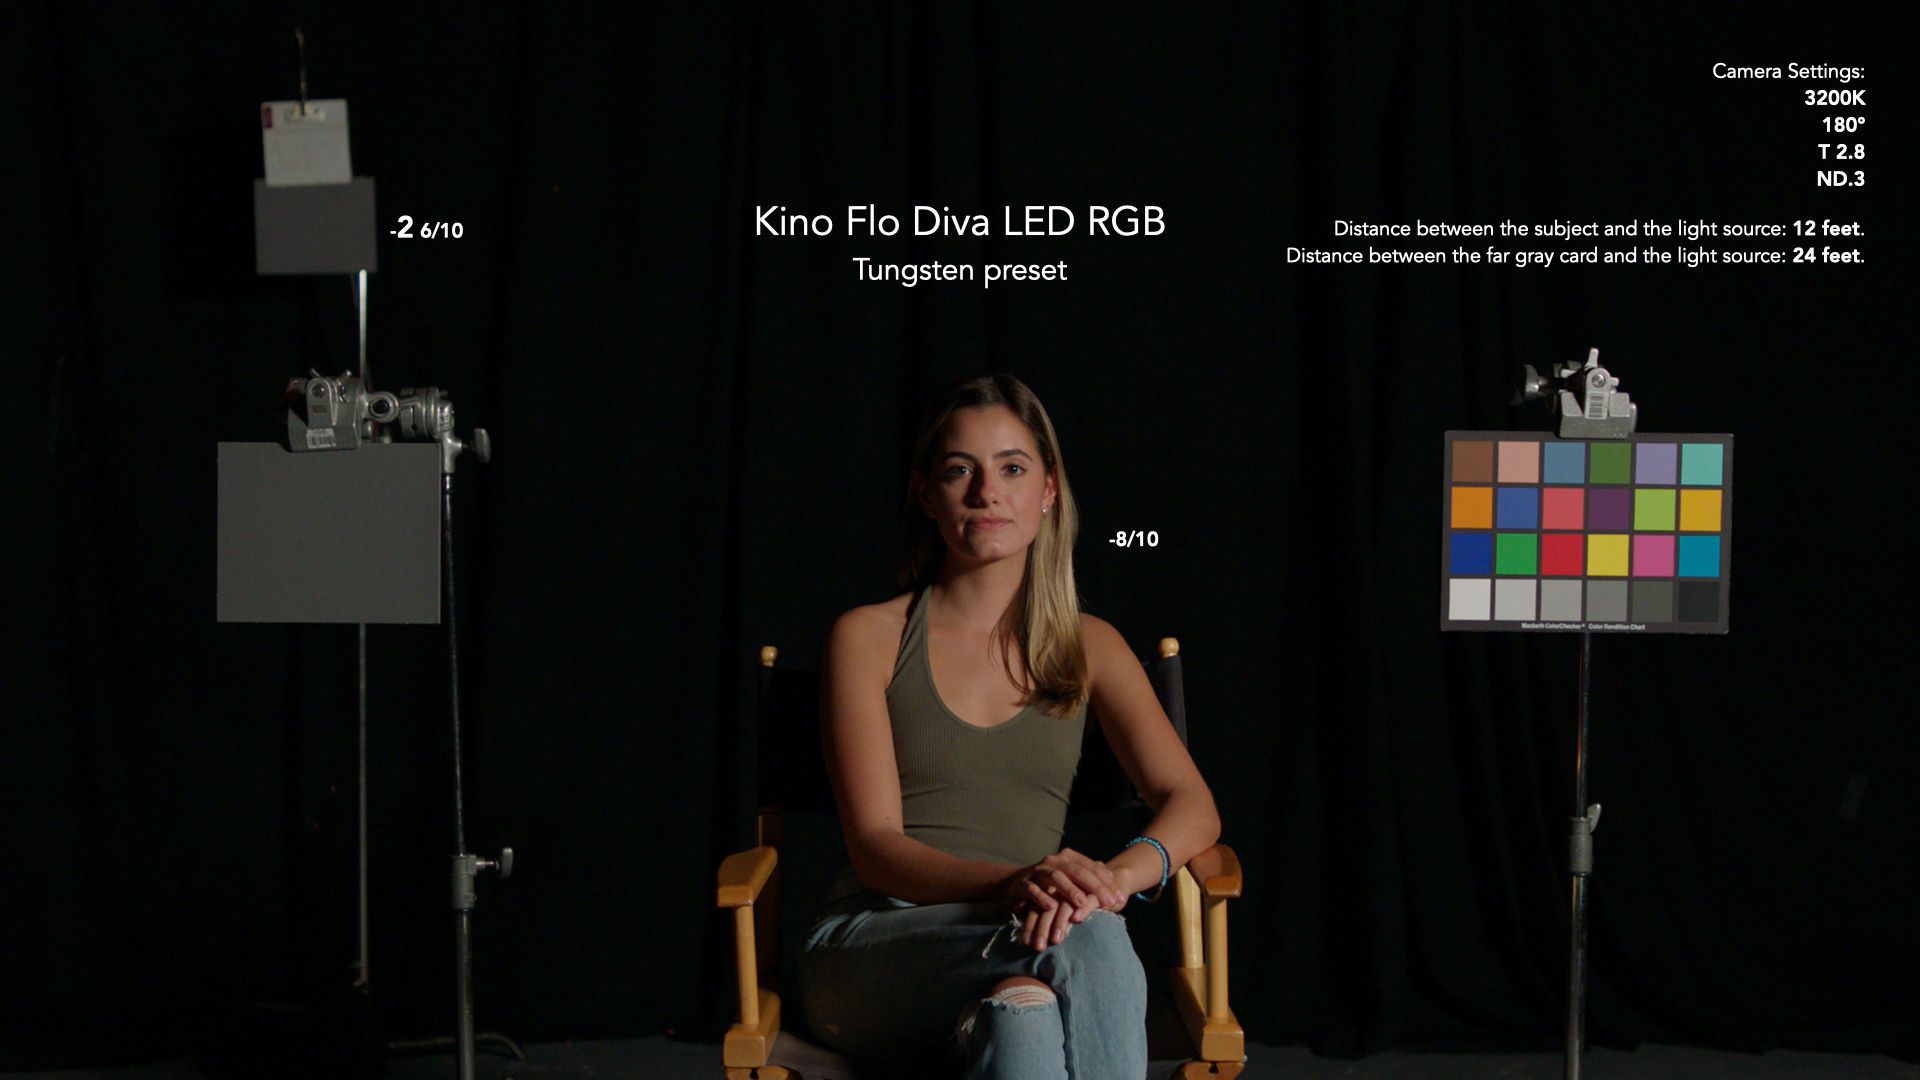
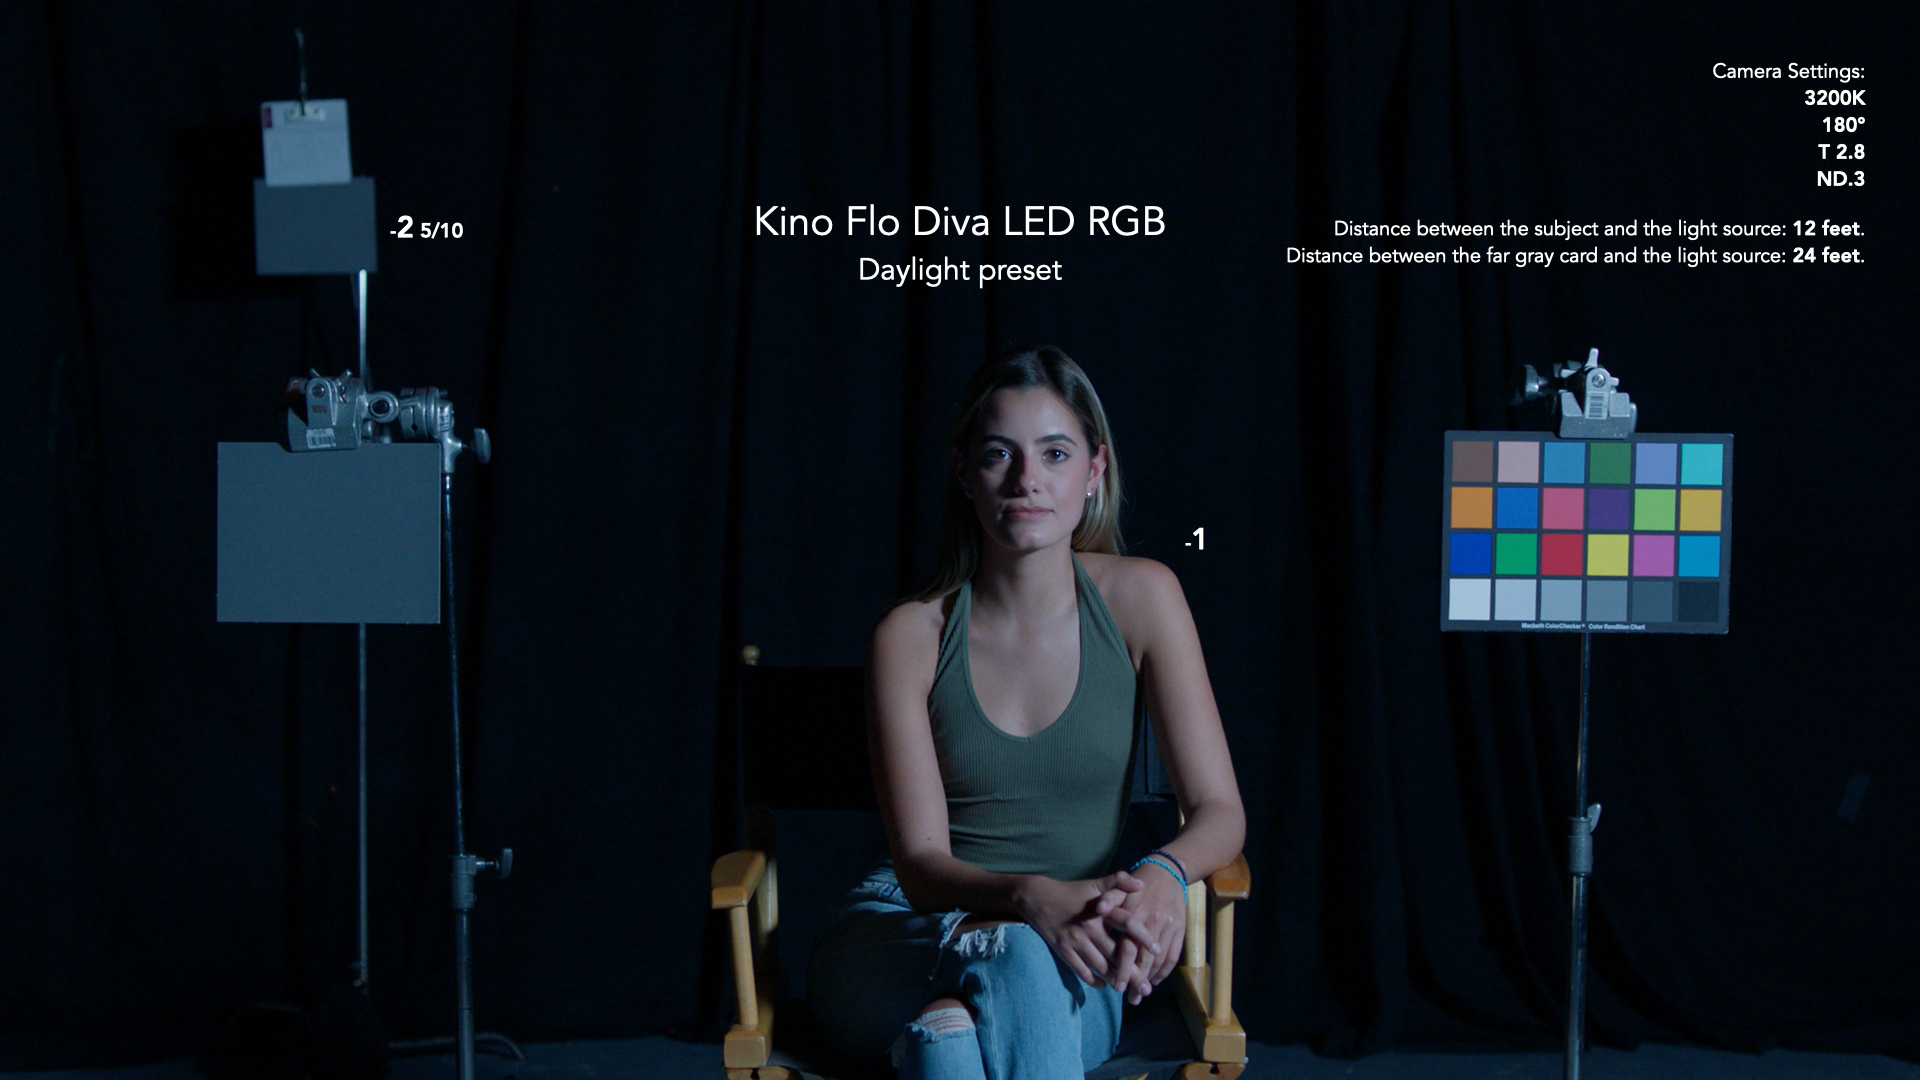
Starting with the weakest light source available, each light is placed 12 ft. away from the model at 9 ft. of height and focused onto the model's face.
Another gray card was placed 24 ft. away from the light source to measure the falloff of the light.
50mm Arri Ultra Prime lens on an Arri Alexa Mini camera was placed 13 ft. away from the model, creating a medium shot size.
The camera was set to 3200 Kelvin, at 2k resolution, ProRes 4444 codec, 23.98 fps, and 180° shutter angle.
The lens was at T2.8 and an ND.3 was put in front of the lens.
The output of the light on the model’s face and the second gray card were metered and recorded onto the datasheet you may find below.
The camera recorded around 15 seconds worth of footage for each setup.
Then the lights were cut down to f/4 with nets and scrims.
Another 15 seconds of recording...
The lights were gelled to achieve 3200 Kelvin of color temperature.
The slating and recording process was repeated before moving on to the next light.
A color chart and a gray card are placed on each side of the model.
Starting with the weakest light source available, each light is placed 12 ft. away from the model at 9 ft. of height and focused onto the model's face.
Another gray card was placed 24 ft. away from the light source to measure the falloff of the light.
50mm Arri Ultra Prime lens on an Arri Alexa Mini camera was placed 13 ft. away from the model, creating a medium shot size.
The camera was set to 3200 Kelvin, at 2k resolution, ProRes 4444 codec, 23.98 fps, and 180° shutter angle.
The lens was at T2.8 and an ND.3 was put in front of the lens.
The output of the light on the model’s face and the second gray card were metered and recorded onto the datasheet you may find below.
The camera recorded around 15 seconds worth of footage for each setup.
Then the lights were cut down to f/4 with nets and scrims.
Another 15 seconds of recording...
The lights were gelled to achieve 3200 Kelvin of color temperature.
The slating and recording process was repeated before moving on to the next light.
OUTCOME
The best way to view the results of this study is by reviewing the datasheet and the example frame grabs below. But there are also some other findings we find worth sharing, such as:
The Mole-Richardson Junior 2K can give the same output as an Arri Skypanel S-60 but harder.
How much light a CTO or a CTB gel cuts directly depends on that particular lighting fixture's actual color temperature.
All of the LED fixtures we tested are 1/10 of a stop more powerful when it comes to outputting daylight-balanced light.
Tungsten lights are very reliable when it comes to matching different fixtures. (e.g. The color rendition of a 2K and a 650w are virtually the same)
DATASHEET
The sheet below is a simplified version of the spreadsheet used during the study. It gives two sets of important information for each type of light: the raw output and the falloff.
It should be noted that the measured intensity does not equal the cumulative output of the light. For instance, Source Four LED's measured intensity is higher than Arri Skypanel S-60's simply because of the differences between the light qualities of the fixtures. The former produces harder, more direct light while the latter's light is scattered and softer, thus lighting a bigger area.
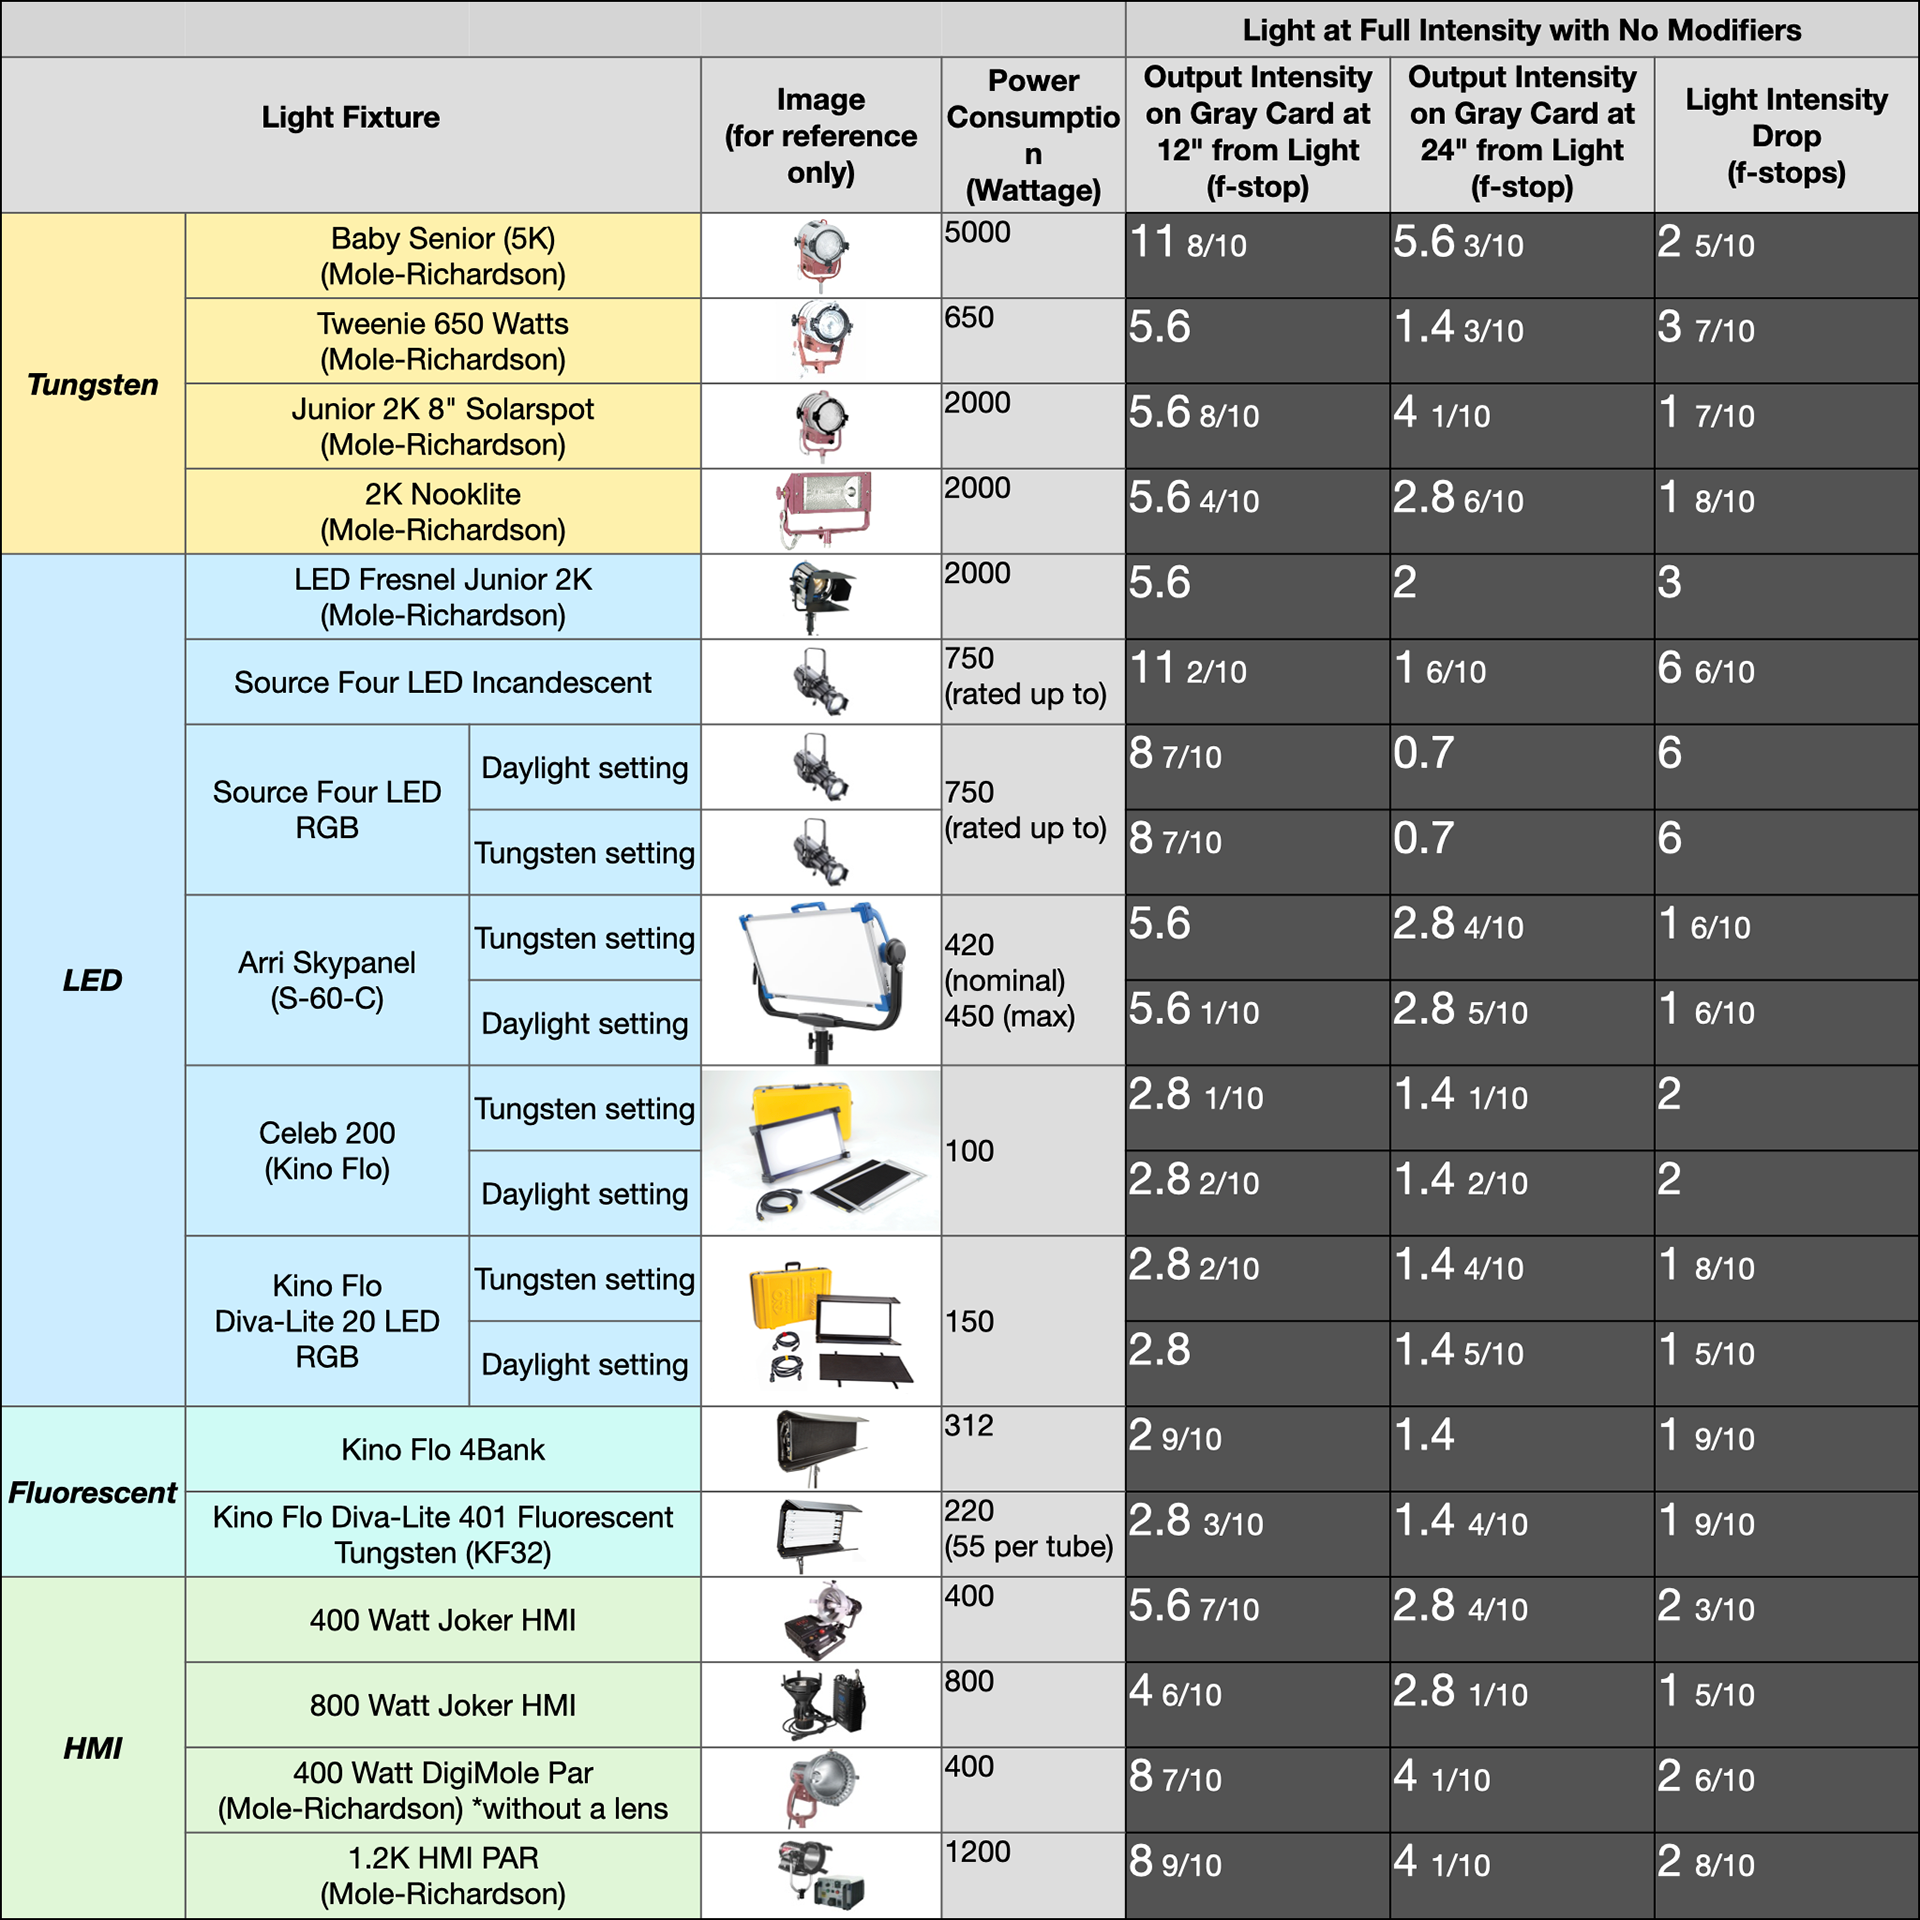
The low output result for the 800-watt Joker HMI is due to a faulty unit.
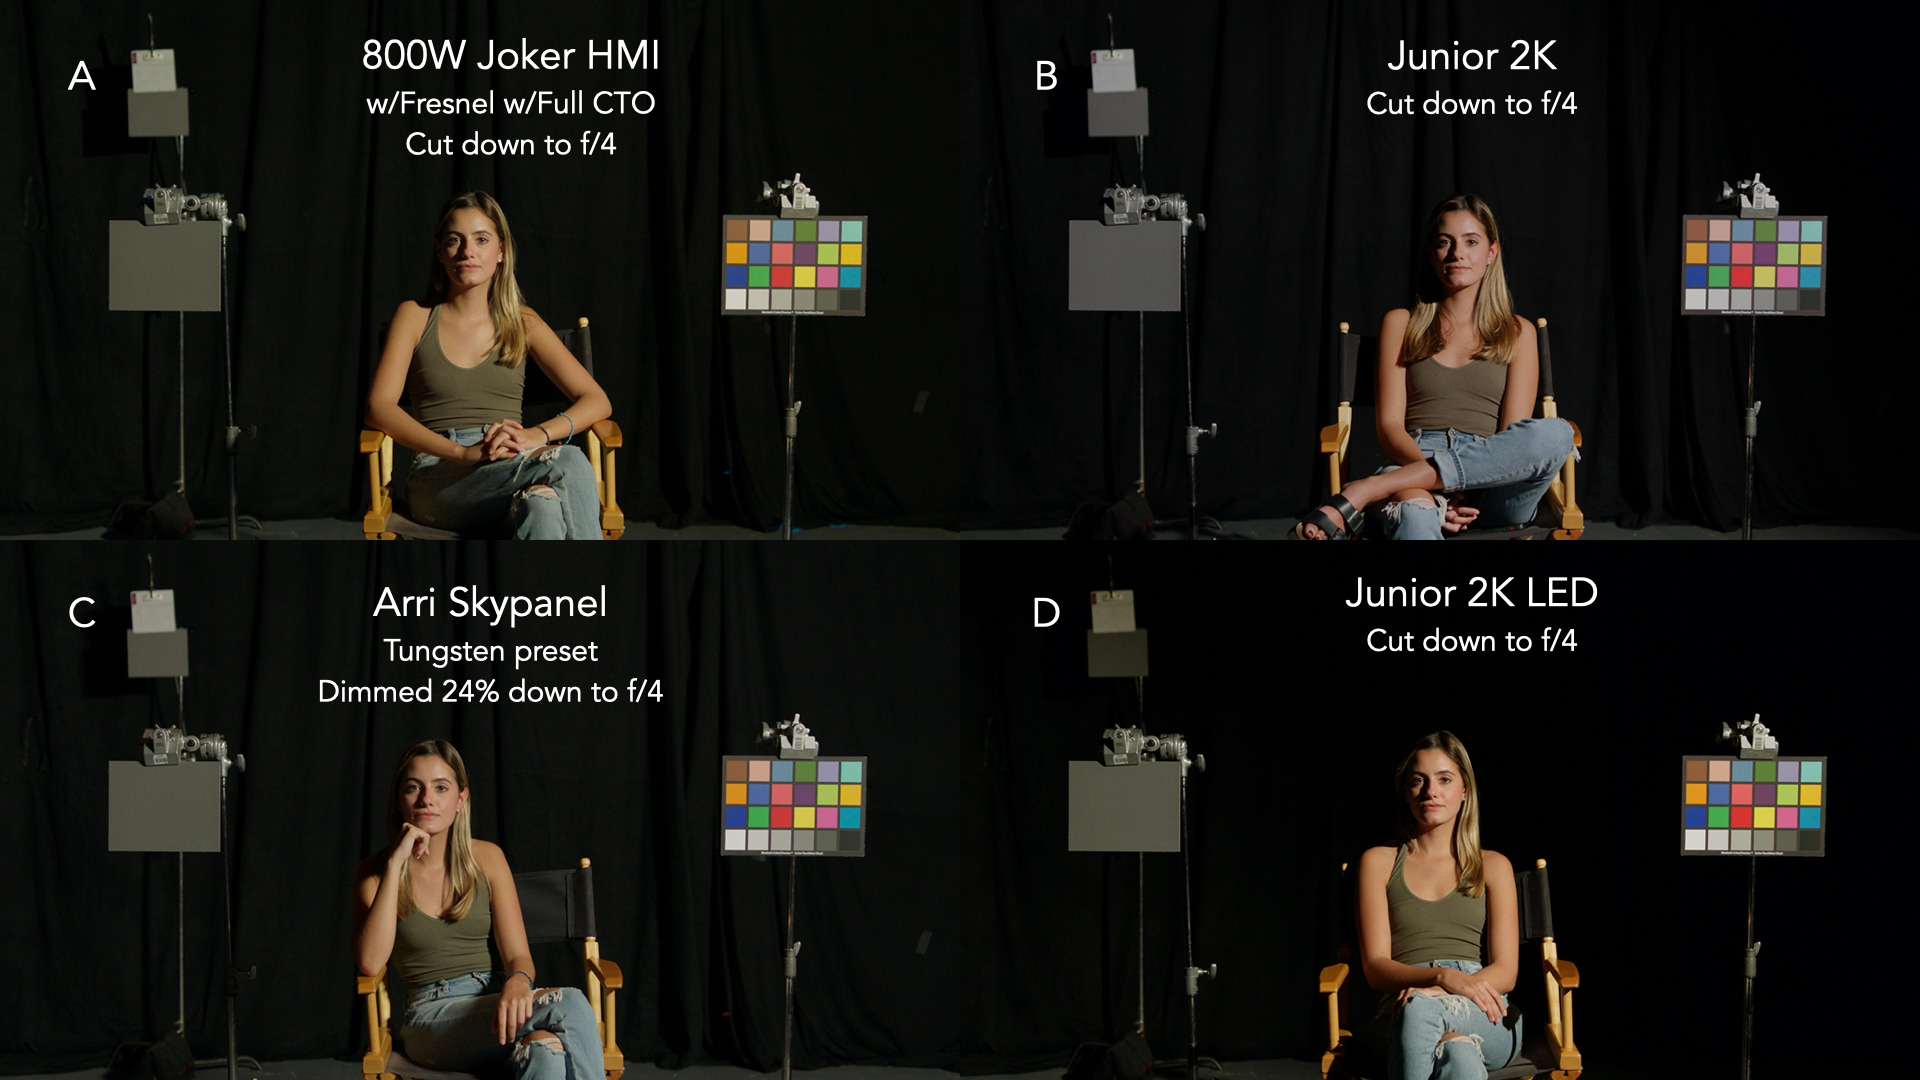
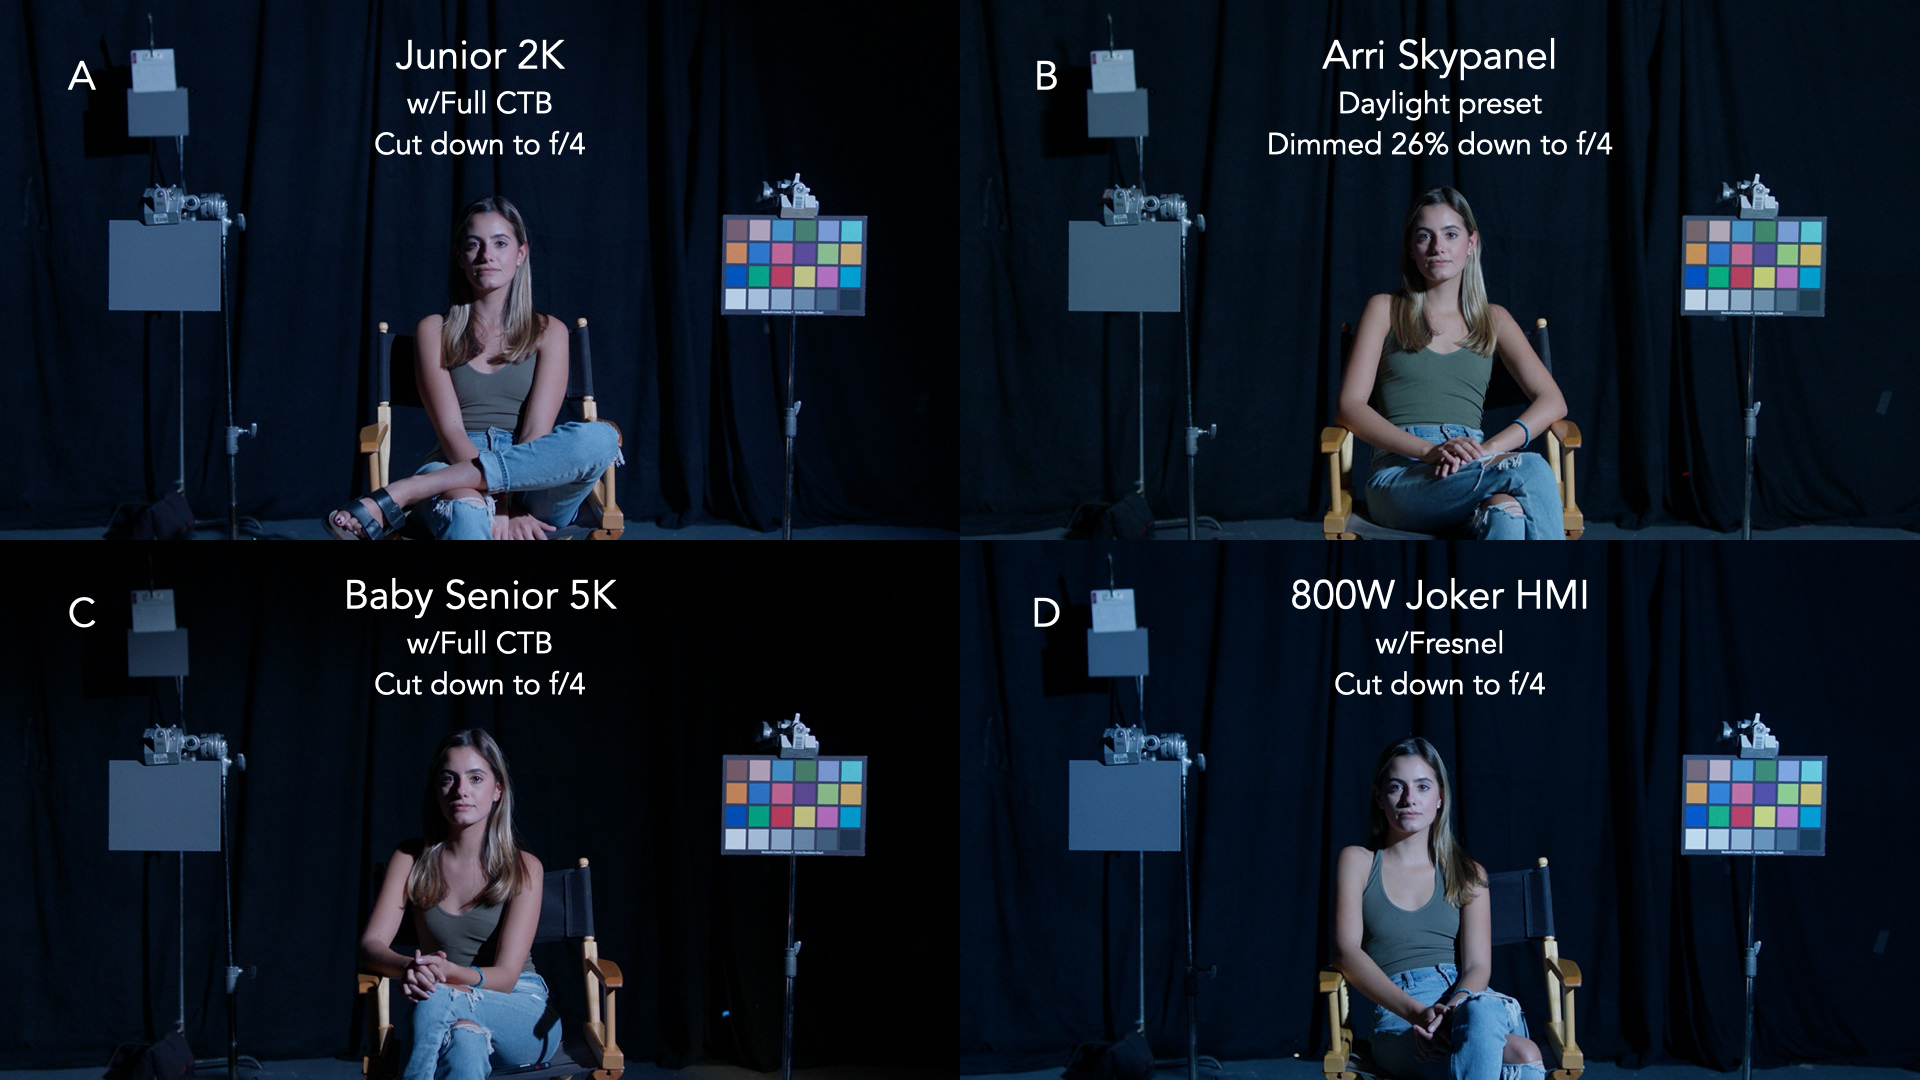
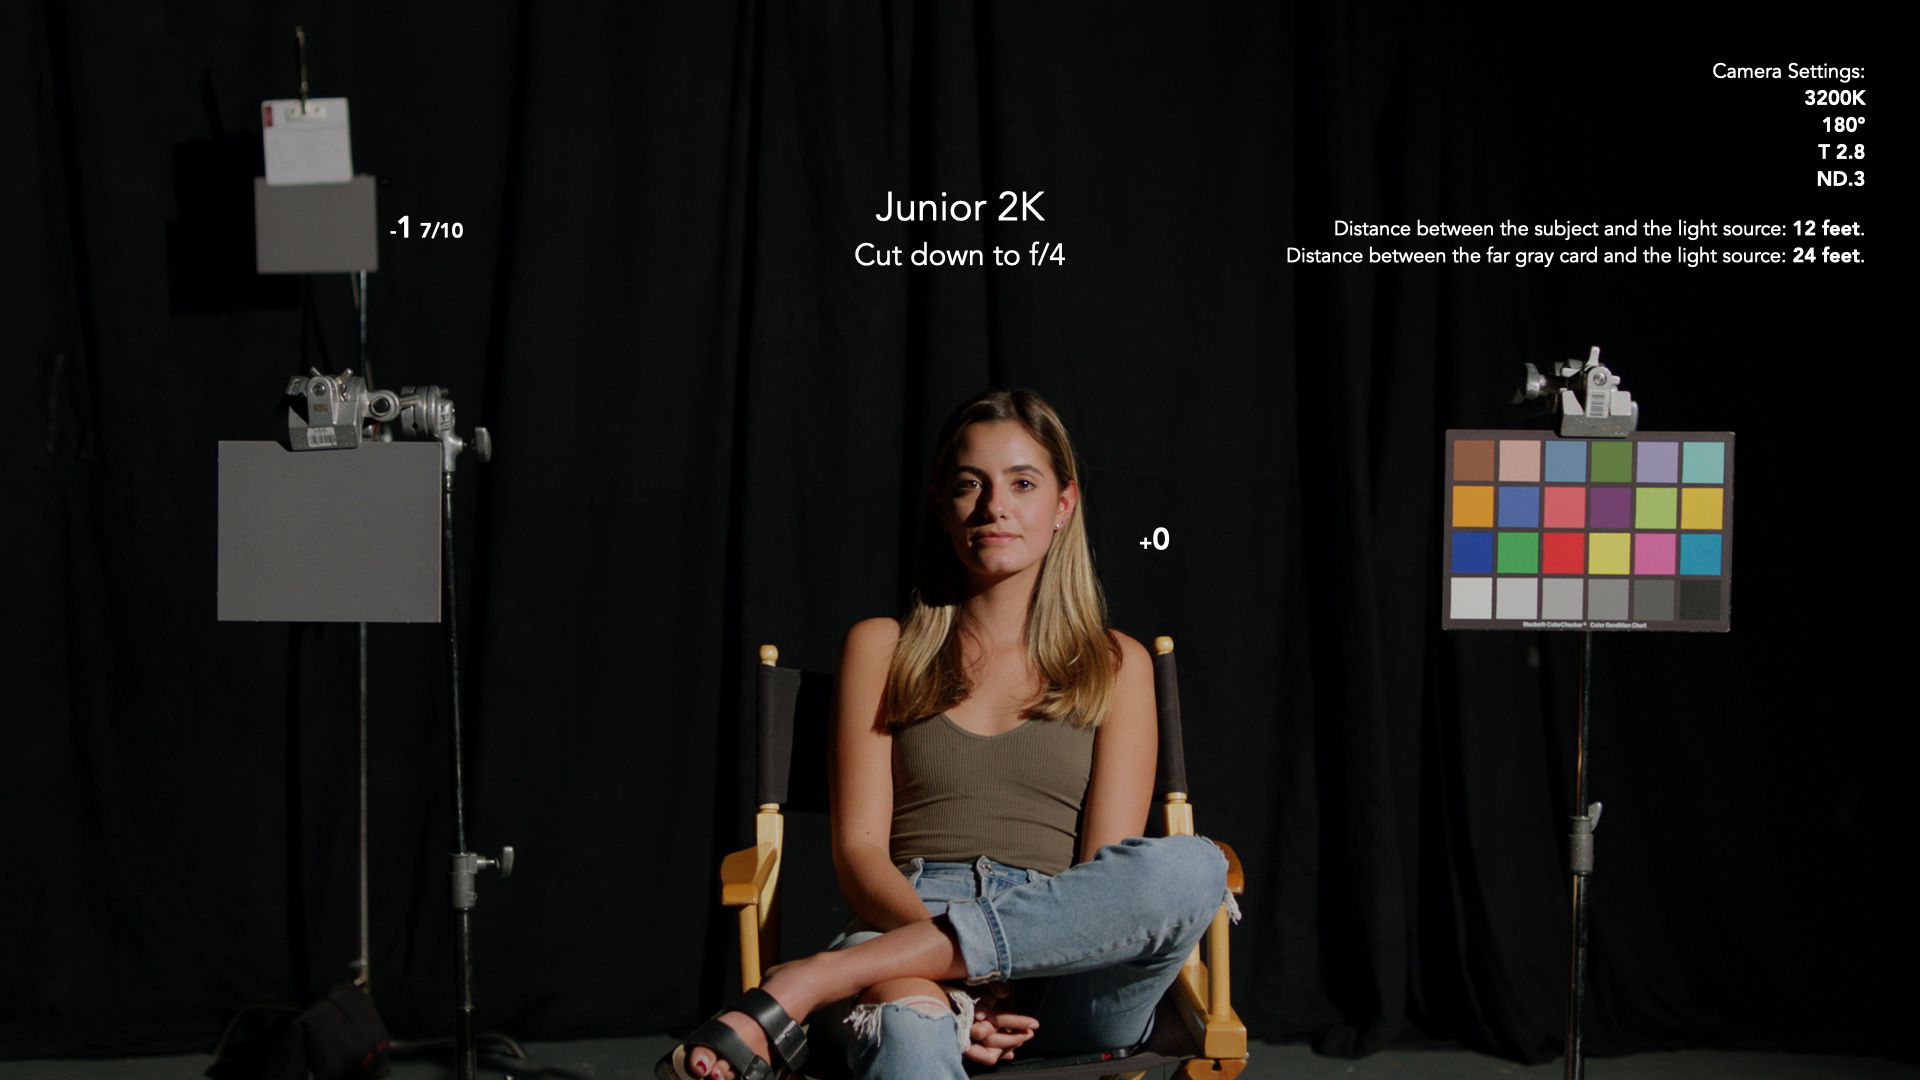
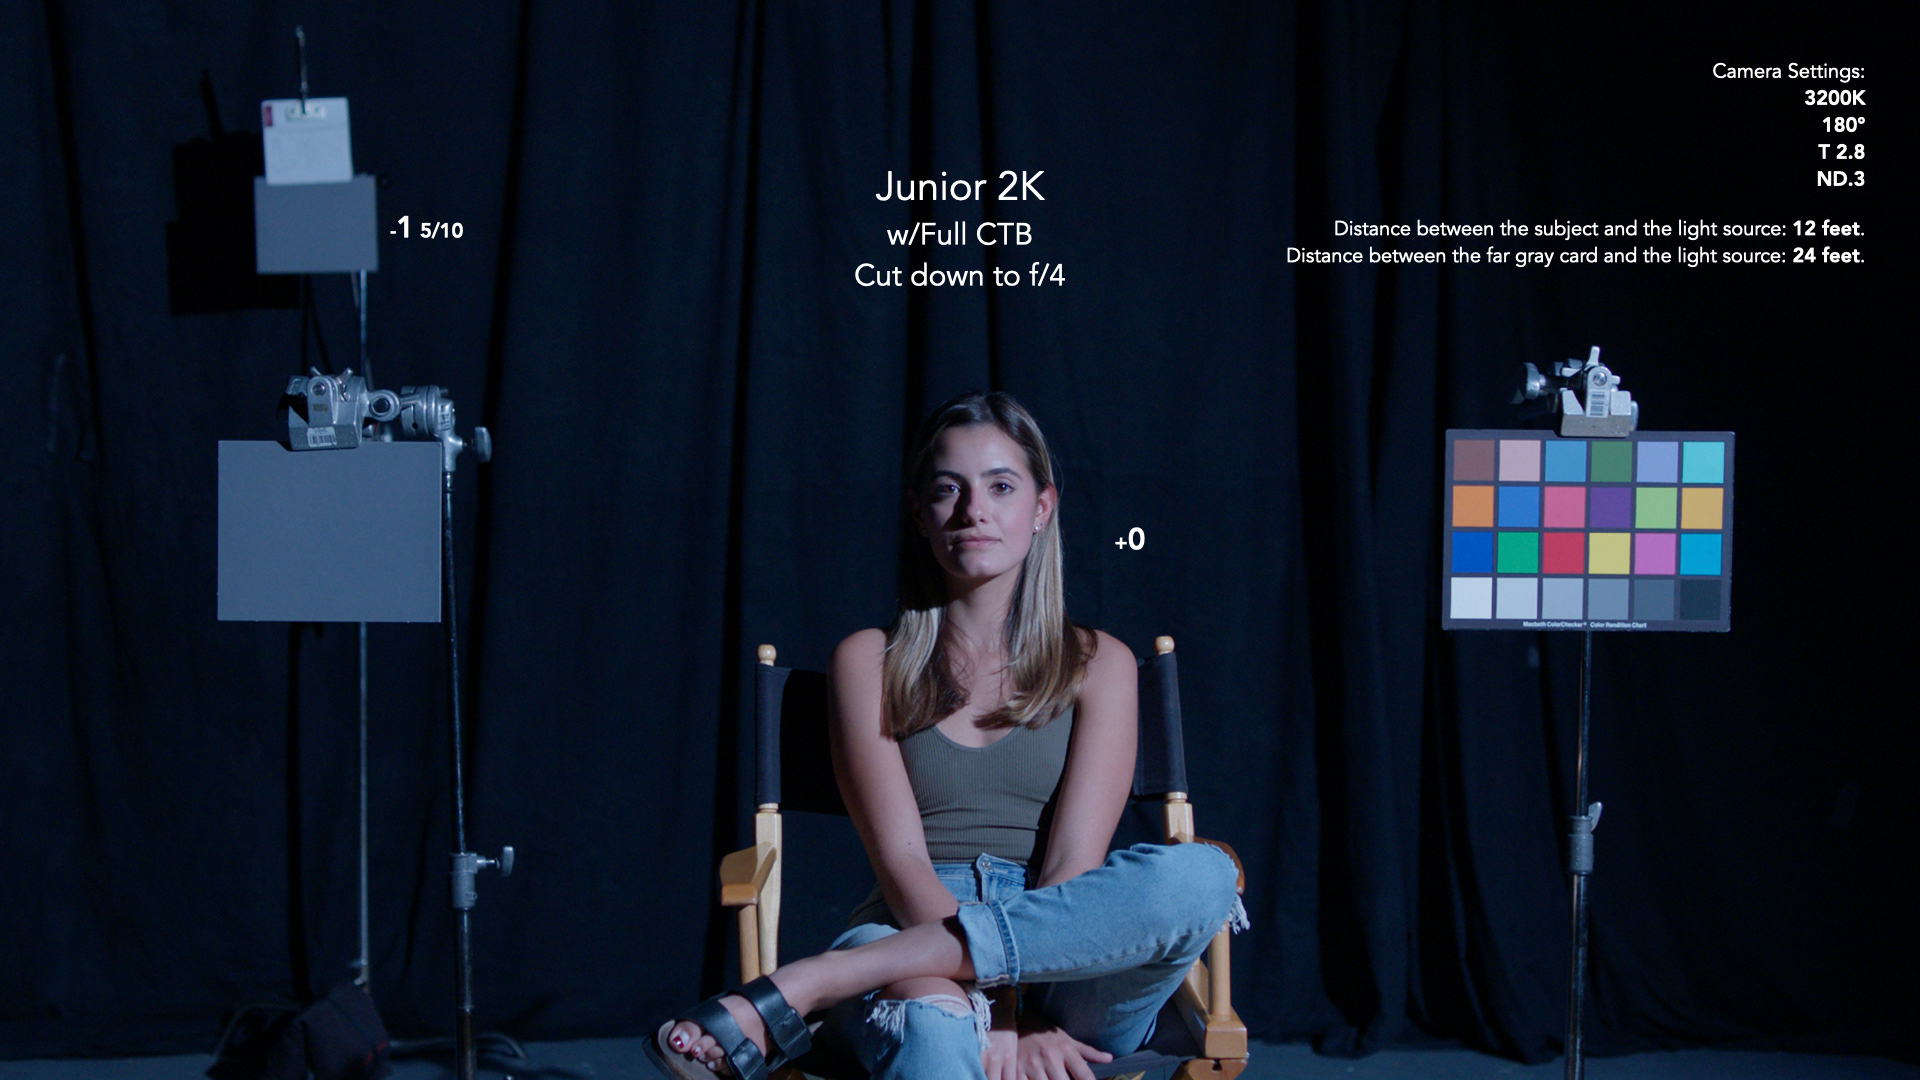
COMPARISONS and FRAME GRABS
For solo images, the numbers next to the model and the far gray card represent the difference between the ideal and the actual light intensity.